


IN THIS ARTICLE
PS: We specialize in raising and leveling concrete (mud jacking) for driveways, walkways, pool decks, concrete floors, and warehouse concrete floors, restoring stability in NJ and PA cities. We do not coat or seal concrete, perform residential crack repair, or use polyurethane for leveling.
Discover how to give your garage concrete floor the Perfect Raising and Coating.
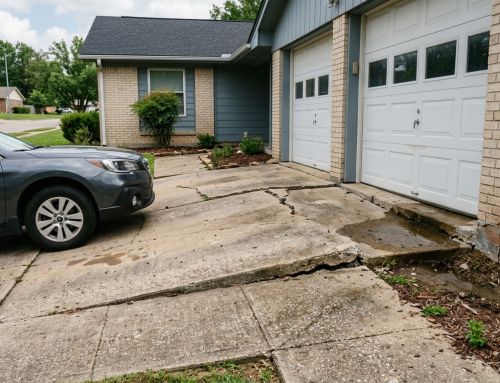
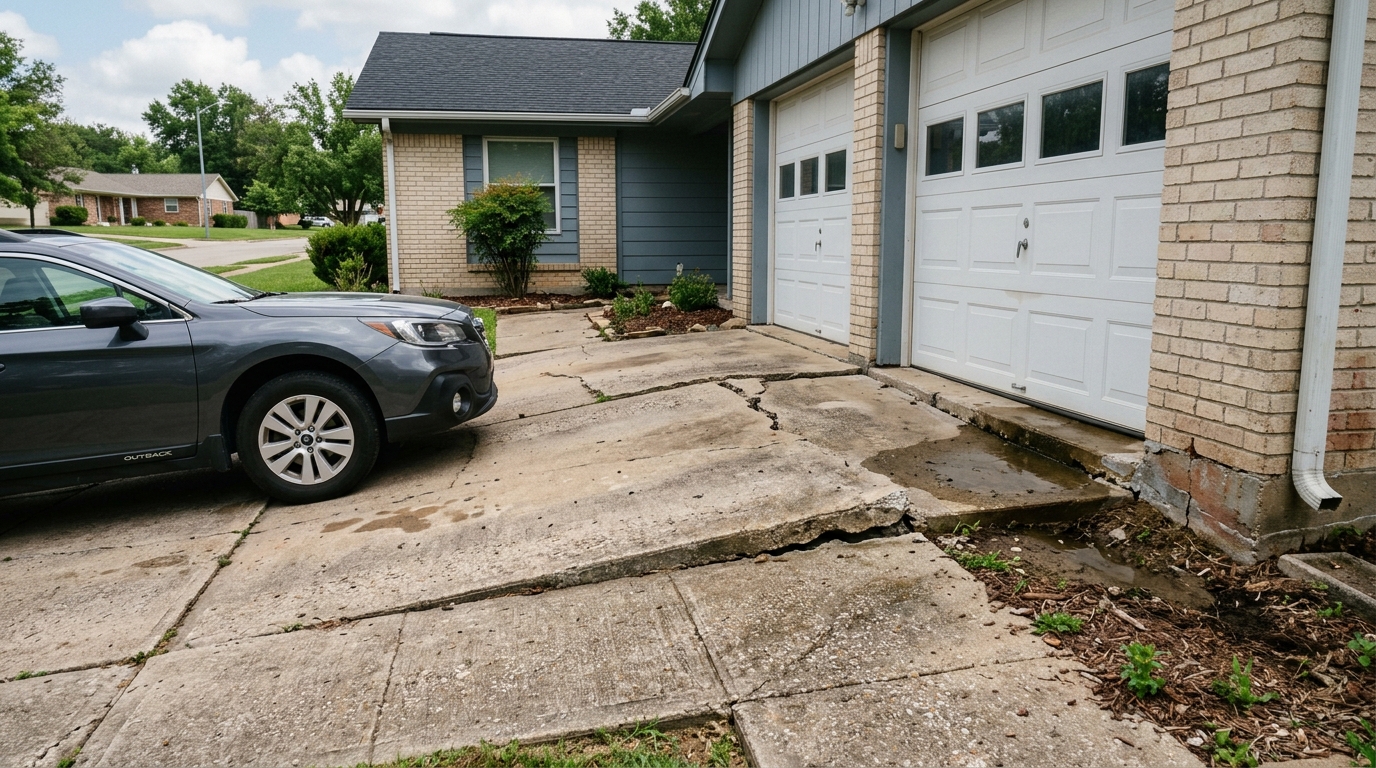
Your garage floor isn’t just a surface on which to park your car. It supports the weight of your vehicles and is the stage for various activities, from car maintenance to DIY projects. However, many homeowners overlook the importance of maintaining their garage floors. Over time, concrete garage floor settlement and wear and tear can take a toll, leading to cracks, pits, and uneven surfaces.
But fear not.
Various garage floor coating options and coverings, such as garage floor tiles and mats, can rejuvenate a worn-out surface, offering enhanced durability, aesthetics, and protection.
You might consider garage floor mats or tiles as alternatives to traditional epoxy coatings, especially if the floor is slightly cracked or stained. Depending on your flooring needs, there are plenty of floor coating options that can provide varying results.
Garage floor raising and coating can revitalize your garage, providing durability, aesthetics, and protection. In this comprehensive guide, we’ll delve into the why, the how, and the benefits of this transformative process.
Why Raise and Coat Your Garage Floor?
Before diving into the nitty-gritty of garage floor raising and coating, let’s understand why it’s essential. Your garage floor faces a barrage of challenges daily – vehicle traffic, chemical spills, moisture, and more. Over time, these factors can lead to cracks, erosion, and deterioration, compromising the structural integrity of your garage.
Raising and coating your garage floor addresses these issues in several ways:
Repair and Prevention:
Raising your garage floor can correct uneven surfaces and support your garage floor, preventing further damage.
Enhanced Durability:
Coating your garage floor adds an extra layer of protection, making it more resistant to stains, abrasion, and chemicals.
Improved Aesthetics:
A fresh coat of epoxy or polyurethane not only protects your floor but also enhances its appearance, giving your garage a polished and professional look.
Increased Property Value:
A well-maintained garage with a raised and coated floor adds value to your property, making it more attractive to potential buyers.
Now that we understand the importance, let’s explore the steps involved in raising and applying a garage floor epoxy coating to your garage floor.
Step-by-step guide on raising and applying a garage floor epoxy coating to your garage floor
Step 1: Preparation is Key
Like any successful project, preparation is crucial for garage floor raising and coating. Here’s what you need to do:
- Clear the Space: Remove all items from your garage, including vehicles, tools, and storage items. This will provide ample space to work and prevent damage to your belongings.
- Raise or level the Garage Floor: If your garage floor is sinking, have it raised through mud jacking or slab jacking.
- Clean Thoroughly: Sweep away any dirt, dust, and debris from the floor surface. Use a degreaser to remove any oil or grease stains. A pressure washer can be highly effective for this task.
- Repair Cracks and Pits: Fill in any cracks or pits in the floor using concrete patching compound. For longer-lasting repairs, you might also consider using joint and crack sealant. Smooth out the surface with a trowel and allow it to dry completely.
- Etching and Priming: Before applying the right concrete floor coating for your epoxy project, etch the floor for better adhesion and apply a primer as part of your floor coating kits. Utilizing diy kits can streamline this installation process by providing essentials, such as screws, to secure any loose elements for more efficient project completion.
Step 2: Raise the Floor
Now comes the exciting part is raising your garage floor to create a smooth and level surface. There are various methods for achieving this, depending on the extent of the damage and your budget:
- Concrete Leveling or Mudjacking: This is done by drilling 5/8” to 1” holes through your garage floor, then injecting a cement grout or polyurethane concrete lifting foam under the concrete floor slab to raise it.
- Self-Leveling Compound: Ideal for minor unevenness, self-leveling compound is a quick and easy solution. Mix the compound according to the manufacturer’s instructions and pour it onto the floor. It will level itself out and provide a smooth finish.
- Concrete Resurfacer: For more significant imperfections, a concrete resurfacer can work wonders. This product is specially formulated to bond to existing concrete and create a new, durable surface. Apply it with a squeegee or trowel, following the manufacturer’s guidelines.
- Professional Services: For extensive damage or if you prefer to leave it to the experts, hiring a professional contractor is always an option. They have the knowledge, experience, and equipment to assess your garage floor and recommend the best course of action.
Step 3: Coat for Protection and Style
With your garage floor now level and smooth, it’s time to apply the finishing touch – a protective coating. Epoxy and polyurethane are two popular options, each with its own set of advantages:
Epoxy Coating:
Epoxy coating is a favorite among homeowners because of its durability and chemical resistance. It creates a glossy, seamless finish that is easy to clean and maintain.
Epoxy, comprising resin and hardener, is available in a variety of colors and can even be customized with decorative flakes or metallic pigments. Applying epoxy at a higher mil thickness enhances coverage and resilience.
Polyurethane Coating:
If you’re looking for maximum durability and UV resistance, polyurethane coating is the way to go. It forms a tough, flexible layer that can withstand heavy traffic and harsh environmental conditions.
While not as glossy as epoxy, polyurethane offers excellent protection against stains and abrasion. This type of coating often comes with a substantial warranty for peace of mind.
Painting:
Unlike epoxy, polyurethane, or polyaspartic garage floor coatings, painting your garage floor does not require the same equipment or skill level.
While not as durable as epoxy or polyurethane coatings, the advantages are that it is within the skill level of most homeowners, is less expensive, and can be touched up easily should an area failure occur, such as from hot tires.
Whichever coating you choose, the application process is similar:
- Prepare the Surface: Ensure the floor is clean and dry before starting. If using epoxy, etch the surface with a concrete grinder or acid solution to promote adhesion. A primer coat may be necessary to enhance bonding and coverage.
- Mix the Coating: Follow the manufacturer’s instructions to mix the coating components thoroughly. For best results, use a drill with a mixing paddle.
- Apply the Coating: Use a roller or squeegee to apply the coating evenly to the floor surface. Work in small sections, and be sure to overlap each pass to avoid missed spots.
- Add Optional Elements: To add texture and visual interest, sprinkle decorative flakes or pigments onto the wet coating. A random broadcast flake floor is a popular design choice.
- Allow to Cure: Let the coating cure according to the manufacturer’s recommendations before walking or driving on it. This typically takes 24-48 hours, depending on the product and environmental conditions. Consider using a topcoat to seal your work for added protection and shine.
You can see an epoxy coating applied in the This Old House video:
Is car garage floor lifting and coating worth it?
Yes, garage floor lifting and coating are worth it. Lifting prevents further damage and restores safety, while coating adds durability, protection, and a polished look. It increases property value and saves money on future repairs.
Raising and coating your garage floor is a transformative process that enhances its aesthetics and provides long-lasting protection against damage and deterioration. By following these steps and choosing the right materials, you can enjoy a smooth, durable floor that will stand the test of time.
Do you want to raise your concrete?
Contact us for a professional evaluation from one of our team experts.Click to contact Concrete Chiropractor now for a free quote!
FAQs
How long does it take for garage floor coating to cure?
It depends on the type of coating used. Epoxy coatings usually take about 24–72 hours to dry and up to a week to fully cure. Polyurea coatings cure much faster, often within 24 hours. However, curing times can be affected by temperature and humidity.
Can all floors be lifted and repaired?
Most garage floors with sinking or uneven spots can be lifted and repaired using mudjacking. However, if the concrete is too damaged, cracked beyond repair, or severely deteriorated, replacement might be a better option. We assess each case individually to determine the best solution.
What are the pros and cons of epoxy and polyurea coatings?
- Epoxy Pros: Durable, resistant to stains, and available in many colors and finishes.
- Epoxy Cons: Takes longer to cure, can be prone to cracking over time, and may yellow with UV exposure.
- Polyurea Pros: Extremely durable, fast curing, flexible (resists cracking), and UV stable.
- Polyurea Cons: More expensive than epoxy and requires professional installation.
What is the cheapest way to raise a garage floor?
Mudjacking is the most cost-effective way to lift a sinking garage floor. Unlike polyurethane injection, which is more expensive, mudjacking uses a mix of cement, sand, and water to fill voids and lift the concrete back into place. It’s a strong and long-lasting solution at a lower cost.

- How to Prevent Expensive Pool Deck Repairs in NJ - June 1, 2026
- Pool Deck Repair Cost in NJ: Leveling vs Replacement - June 1, 2026
- Leveling Pool Decks & Patios in Ocean County Before Summer Starts - April 13, 2026